Table Of Contents
Using ESP8266 as an IoT Endpoint with Encrypted MQTT Transport
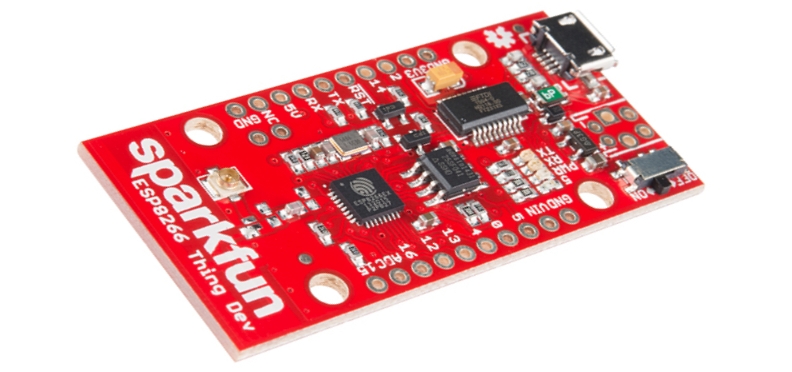
A while back, I purchased a few SparkFun Thing Dev boards (featuring the venerable ESP8266 WiFi chipset) and SparkFun Beefcake Relays with a plan to use them in a cloud-free IoT setup. After some investigation, I settled on using the MQTT protocol as a lightweight way to send and receive messages between my Linux server and any number of IoT endpoints throughout my house.
Along the way, I ran into some problems when trying to get the ESP8266 board to successfully connect to the MQTT broker with TLS encryption enabled, so the primary focus of this post will be to explain how to generate a self-signed x509 cert for the MQTT broker, and supply that to the ESP8266 via the Arduino IDE to make a successful connection.
I will dabble in a little more detail about my full setup beyond that, but will probably save that for another day.
Prerequisites
For the purposes of this tutorial, you only really need one of these for hardware:
- SparkFun Thing Dev (or equivalent)
As for software/libraries, we’ll be using the following:
- Arduino IDE - We will be using Arduino-compatible libraries for programming the ESP8266. There are certainly alternatives, but I’m choosing this for ease of use.
- Mosquitto - Mosquitto is an MQTT broker/client implementation by the Eclipse Foundation. It’s pretty readily available for most platforms (Arch Linux in my case) and will be the central broker managing our MQTT setup. You don’t have to use Mosquitto, specifically, but that’s what I’m using, so any broker configuration guidance here will be based on Mosquitto.
- OpenSSL - We’ll use this from the command line to generate a CA cert/key and a server cert for our MQTT broker.
- ESP8266 Arduino Library - This provides Arduino-compatible libraries for the ESP8266. We will focus on using the ESP8266WiFi library, which uses the BearSSL libraries for SSL/TLS encryption.
- Arduino Client for MQTT - MQTT client support for pub/sub via Arduino code.
- Arduino JSON (optional) - For my purposes, I will be using pub/sub messages containing JSON rather than plaintext, and this library provides full JSON support to the Arduino IDE.
I won’t go into exhaustive detail about acquiring/installing the above software, but most of the Arduino libraries can be installed via the Arduino IDE Library Manager or manually via .zip files from the respective Github release pages. Other software like OpenSSL and Mosquitto can be installed either manually or using your system’s package manager.
Some discussion about configuring the MQTT broker with Mosquitto will be addressed here, where it comes to enabling encryption and x509 cert usage.
Generating a CA Cert and Self-signing an MQTT Server Cert
In order to generate x509 certs, you have a couple of options:
- Get your own CA cert via a reputable cert signing authority like Let’s Encrypt
- Self-sign a cert
- Create your own self-signed CA and use that to sign a cert for your MQTT broker (and any other services) to use
In my case, my plan is to not have my MQTT broker exposed to the outside world. It’s intended to be strictly used either within my LAN or through an SSH tunnel from outside my network. So, either option 2 or 3 will do here. The benefit of option 3 is that I can have a single self-signed root CA cert to put on any devices that will need to access the MQTT broker and I can generate more service-specific certs—like the MQTT broker cert—in the future using the same root CA cert without having to add more certs to all my devices.
To begin, we’ll need to generate a private key for our CA.
Generate a CA Private Key
In my case, I decided to use an elliptical curve key using the secp521r1 curve rather than an RSA key. There’s no specific reason for this choice, but I can tell you it works with the software/libraries I’ve listed above. Feel free to use a different key encryption, but I can’t guarantee it will work. RSA is probably a safe alternative.
To generate our private key we can do the following:
[albeec13@arch ~]$ openssl ecparam -name secp521r1 -genkey -noout -out ca.pem
If you print the key out, you should see something like this. (Don’t worry, this is a contrived key I’ve already discarded, but don’t go around posting your private key anywhere):
[albeec13@arch ~]$ cat ca.pem
-----BEGIN EC PRIVATE KEY-----
MIHcAgEBBEIATXmkkoaxsd7d6QvaLYOFBpVWIKkpZiIVifjWyEvG7KORzlGXuWzA
67CkiTbUMscnzM7kn/YrwmITRDaYQ2eF0jagBwYFK4EEACOhgYkDgYYABAFzgTPk
co/CM1hNYyRm8Tnlq0l+rnFSst74VHqoj2wD9XOz7W8iFX1C0J4KsQy2N6FAccym
72tTstwCruZmuc91mgC+RyRm9TxcwvztEOFDkWeKpVCrheILGH03zBqb93p9nTIa
Ofz3Vh5+PjOoh3NGbPfS2UEKITVxTth9OZ+4rpl7Sg==
-----END EC PRIVATE KEY-----
To keep this safe, put your newly generated key in a well-known location on your server as the “root CA” key and cert storage location.
Generating a Self-Signed CA Cert
Next, we need to generate a CA cert using this CA private key we’ve just generated. First, we’ll create an openssl.ca.conf file to pass our desired params to OpenSSL. :
openssl.ca.conf:
[req]
distinguished_name = req_distinguished_name
req_extensions = v3_req

[req_distinguished_name]
countryName = Country Name (2 letter code)
countryName_default = US
stateOrProvinceName = State or Province Name (full name)
stateOrProvinceName_default = Yourstate
localityName = Locality Name (eg, city)
localityName_default = Yourcity
organizationalUnitName  = Organizational Unit Name (eg, section)
organizationalUnitName_default  = Domain Control Validated
commonName = Organization Name (eg, company)
commonName_default = ca.server.primary.url.or.ip.address
commonName_max  = 64

[ v3_req ]
# Extensions to add to a certificate request
basicConstraints = CA:TRUE
keyUsage = nonRepudiation, digitalSignature, keyEncipherment
Be sure to modify the file above to your specific needs, including the items under the req_distinguished_name (especially commonName_default, which should be the primary IP address or URL of the CA).
Update 10/13/2022: be sure to update the
commonName_defaultfield so that is not reused in theopenssl.mqtt.conffile we will create later. If not, newer versions of OpenSSL will not allow connections when using an MQTT server cert that was signed by a CA cert using the samecommonName_default.
Now, as long as our ca.pem and openssl.ca.conf files are in the same directory, we can generate a self-signed CA cert using this command:
albeec13@arch arch-cert-auth] openssl req -new -x509 -days 3650 -key ca.pem -config openssl.ca.conf -out ca.crt -sha256
Note that we did not generate an intermediate Certificate Signing Request (CSR) and simply generated the cert directly, self-signed by the CA private key. You could perform that extra step (which we will do when creating the MQTT broker cert, below), but since we are self-signing anyway, it’s an unnecessary intermediate step.
Also note that we include -sha256 to generate a SHA256 digest instead of the default SHA1, which is deprecated and may be rejected by clients.
We should now have ca.pem, ca.crt, and openssl.ca.conf in our CA cert storage folder. Technically you don’t need openssl.ca.conf anymore, but we will be re-using a modified version of it for the MQTT server cert, so it’s nice to have around as a template for future use.
Generating an MQTT Broker Private Key
In order to keep everything in a well-known location and owned by the user under which Mosquitto runs via systemd, I created a home directory for the mosquitto user with a cert path under /home/mosquitto/mqtt-cert, which will hold all necessary files for the broker to run with encryption enabled.
In my case, my CA server is the same machine my MQTT broker is running on so I could skip a step and not bother generating a separate private key for the MQTT broker. In the interest of security, and to make this a more general tutorial for those of you not using the same machine for both, we will go through the same process as before and generate a new private key for the MQTT broker:
[albeec13@arch mqtt-cert]$ openssl ecparam -name secp521r1 -genkey -noout -out mqtt-serv.pem
Generating a MQTT Broker Certificate Signing Request (CSR)
Update 10/13/2022: We can start with the
openssl.ca.conffile we created earlier as a basis, but it’s very important to update thecommonName_defaultfield minmally (see update below). For the MQTT server cert, I wanted to add mutliple alternate SubjectAlternativeName(s) (SANs) to my cert for flexibility (see thealt_namessection below. After creating a copy of theopenssl.ca.confand calling itopenssl.mqtt.conf, we can modify it as shown below:
openssl.mqtt.conf:
[req]
distinguished_name = req_distinguished_name
req_extensions = v3_req

[req_distinguished_name]
countryName = Country Name (2 letter code)
countryName_default = US
stateOrProvinceName = State or Province Name (full name)
stateOrProvinceName_default = Yourstate
localityName = Locality Name (eg, city)
localityName_default = Yourcity
organizationalUnitName  = Organizational Unit Name (eg, section)
organizationalUnitName_default  = Domain Control Validated
commonName = Organization Name (eg, company)
commonName_default = your.server.primary.url.or.ip.address
commonName_max  = 64

[ v3_req ]
# Extensions to add to a certificate request
basicConstraints = CA:FALSE
keyUsage = nonRepudiation, digitalSignature, keyEncipherment
subjectAltName = @alt_names

[alt_names]
DNS.1 = localhost
IP.1 = 127.0.0.1
IP.2 = 192.168.1.101
We change the basicConstraints = CA:TRUE from the CA config to say CA:FALSE instead, since this is the MQTT server cert, not a CA cert. I’ve also added SANs for the various ways this server will be addressed, via both local interfaces (localhost, 127.0.0.1) on the server itself and its LAN-wide address (192.168.1.101), which will be used by our IoT devices. This ensures I don’t have to use any insecure flags/switches in software accessing the server where the address or domain name used to access the server might not match the cert’s primary DNS entry and must be ignored.
Update 10/13/2022: Be sure to update the
commonName_defaultfield so that is different from that of the CA cert we generated earlier. If not, newer versions of OpenSSL will not allow connections when using an MQTT server cert that was signed by a CA cert using the samecommonName_default.
Now that we have our private key and openssl.mqtt.conf files in our /home/mosquitto/mqtt-cert directory, we can generate a new certificate signing request or CSR. The CSR is used to request an MQTT broker cert signed by the CA. When generating the CA cert, we skipped this step and simply generated and self-signed a cert without this intermediate step, but since we’re using the CA to sign our cert now, we must generate a CSR like so:
[albeec13@arch mqtt-cert]$ openssl req -new -out mqtt-serv.csr -key mqtt-serv.pem -config openssl.mqtt.conf -sha256
Generating a CA-signed MQTT Broker Cert
We can use now use the CSR we just generated, and our new CA we created earlier, to create and sign our MQTT broker’s x509 cert, like so:
[albeec13@arch mqtt-cert]$ openssl x509 -req -days 3650 -in mqtt-serv.csr -CA /path/to/ca.crt -CAkey /path/to/ca.pem -CAcreateserial -out mqtt-serv.crt -extensions v3_req -extfile openssl.mqtt.conf -sha256
We should now have a mqtt-serv.crt to use as our MQTT broker’s x509 cert, which has been signed by our own self-signed CA cert! You will also notice that a ca.srl file (serial file) has been created. OpenSSL recommends using -CAcreateserial with -CA to generate a random serial number for the cert. I believe it’s safe to delete this ca.srl file if you don’t intend to specify it as an input for future certs you generate and continue to allow OpenSSL to generate random serials. (I could be wrong, so let me know in the comments.) You can also move it to your CA cert/key storage location for safekeeping instead.
Extracting our MQTT Broker Cert Fingerprint
When we set up our ESP8266 to connect to the MQTT Broker, in addtion to using our CA cert to validate the MQTT broker’s cert, we’ll also want to validate the MQTT broker cert’s SHA1 fingerprint as well. This lets us know we’re seeing the right cert we’ve just generated and not some other cert signed by the CA, which could be malicious. This can be done simply as so:
[albeec13@arch mqtt-cert]$ openssl x509 -noout -in mqtt-serv.crt -fingerprint
SHA1 Fingerprint=FF:69:BB:AD:F0:DE:5F:89:23:F6:96:C1:03:04:23:B4:D3:D5:53:94
We’ll want to make note of this signature for later. Also, note that we did not use the -sha256 flag here and received a SHA1 fingerprint. This is because it appears that, at the time of this writing, the ESP8266WiFi class only supports SHA1 fingerprint matching.
Cert Housekeeping
Now that we have our certs in our /home/mosquitto/mqtt-cert path, we can also copy the root CA cert here. This makes it easier to configure /etc/mosquitto/mosquitto.conf later without having to futz with permissions to our root CA path. Be sure to chown the all the files in this directory to the mosquitto user and group if you’re using the default Mosquitto systemd unit file, or whatever user/group you’re using to start the broker service on your machine:
[albeec13@arch mqtt-cert]$ sudo chown mosquitto:mosquitto *
In total, we must have ca.crt, mqtt-serv.crt, mqtt-serv.pem in this directory in order to start our MQTT broker service with TLS transport encryption enabled.
You may also have mqtt-serv.csr, ca.srl, openssl.ca.conf, and openssl.mqtt.conf in this directory. Leaving these here could be handy for future reference, but you don’t need them if you would rather purge them.
Configuring Mosquitto to use Encrypted Transport
With our certs in hand, it’s pretty simple to enable encrypted transport with Mosquitto. We just need to add a few lines to the end of /etc/mosquitto/mosquitto.conf to configue it to use TLS/SSL encryption like so:
/etc/mosquitto/mosquitto.conf:
listener 12345
tls_version tlsv1.2
cafile /home/mosquitto/mqtt-cert/ca.crt
certfile /home/mosquitto/mqtt-cert/mqtt-serv.crt
keyfile /home/mosquitto/mqtt-cert/mqtt-serv.pem
allow_anonymous true
The listener line just selects a port for our broker to run on, so change it to suit your needs. The other lines are pretty self-explanatory and simply point to the CA cert, the MQTT broker cert, and the MQTT server private key we generated above.
Update 10/13/2022: I’ve added
allow_anonymous trueto config. In Mosquitto versions greater than 2.0, this line is required if you want to use transport encryption without any form of authentication, such as client certificate or user/password encryption. Otherwise, connecitons will be refused. I’ve also addedtls_version tlsv1.2as well, because newer versions of OpenSSL mayb not allow older TLS versions to operate, and generate connection errors as well.
We can then restart the Mosquitto service in systemd with:
[albeec13@arch ~]$ sudo systemctl restart mosquitto
…and verify it’s working with:
[albeec13@arch ~]$ sudo systemctl status mosquitto
You should see that it loaded properly and is running if our config file and cert paths were all correct and with the proper permissions.
Testing our MQTT Broker
To do a quick test, we can use the commands mosquitto_pub and mosquitto_sub from the command line to see if things are working as we expect. These are included in the Arch Linux repository for Mosquitto, but you may need to install additional packages if your setup differs from mine.
First we subscribe to a topic (here I made up a fake topic), by pointing to the broker’s IP, the CA cert file, and adding an & to run in the background (optionally, you can just run the commmands from separate consoles):
[albeec13@arch ~]$ mosquitto_sub -h 127.0.0.1 -p 12345 --cafile /path/to/ca.crt -t home/recroom/tv/powerstrip/cmd -v &
[1] 13174
You may want to run the above command in the foreground first to make sure it connects. If it does not, check your cert paths and make sure you’re using the right files, and that mosquitto.conf is properly configured.
Next, we publish a message (in this case I’m using JSON, which will be handy for my project, but you can use plain text) by using the same IP and CA cert info and topic:
[albeec13@arch ~]$ mosquitto_pub -h 127.0.0.1 -p 12345 --cafile /path/to/ca.crt -t home/recroom/tv/powerstrip/cmd -m {\"set\":\"toggle\"}
some/topic/cmd {"set":"toggle"}
If it worked, you should see the topic and message payload appear in the console as shown above in the second line: some/topic/cmd {"set":"toggle"}
And there you go! We’ve got encrypted MQTT messages.
Finally, you can kill the mosquitto-sub task by bringing it to the foreground and pressing CTRL+C:
[albeec13@arch ~]$ fg
mosquitto_sub -h 127.0.0.1 -p 36969 --cafile /home/mosquitto/mqtt-cert/arch-ca.crt -t home/recroom/tv/powerstrip/cmd -v
^C
[albeec13@arch ~]$
Now that we have a working encrypted-transport MQTT broker running, we can move on to the ESP8266 side of things.
Running ESP8266 as an MQTT-enabled IoT Endpoint
Update 10/13/2022: As some of the user comments below mention, some of the below tutorial may not be 100% accurate with respect to actual server certificate validation on ESP8266. My intentions for this tutorial were to get transport encryption with anonymous connections working (or with user/pass or client cert, for that matter, which I have not implemented yet). Basically, I didnt’ want MQTT traffic sent over my network “in the clear”, but I’m not concerned about validating the server I’m connecting to, since it’s on my internal network. Please keep that in mind when going throught he process below. Based on comments from readers and my own research of the BearSSL libraries, it does appear that the steps below will enable SSL/TLS encrypted transport, but will NOT validate the server. The best you can do is use only fingerprint validation to get at least some “security” that you’re connecting to the right server. I would not use the below to connect to a public MQTT server you do not control.
As mentioned in the prerequisites, we’ll be using Arduino Client for MQTT to talk to our MQTT broker from the ESP8266 device. We’ll also need the ESP8266 Arduino Library to get our device working within the Arduino development environment. See the prerequisites section again for details on the hardware and software we’re using.
I won’t go into the details of how to get your hardware working with the Arduino IDE, so I will just assume you’ve got that figured out and have run through a “hello world” to make sure things work.
We’ll go through a few steps to get a working Arduino sketch, which I will go through here, followed by the full copy of the sketch.
Getting ESP8266 Connected to a WiFi AP
The first problem we’ll tackle is connecting our device to our LAN’s AP so that it can reach the MQTT broker’s server. I’ve got an LED built into the board at GPIO pin 5, and my relay signal coming out of GPIO pin 4 to my Beefcake Relay board.:
#include <ESP8266WiFi.h>

#define ESP8266_LED (5)
#define RELAY_SIGNAL_PIN (4)
#define SERIAL_DEBUG

void setup()
{
  /* Set board's GPIO pins as an outputs */
  pinMode(RELAY_SIGNAL_PIN, OUTPUT);
  pinMode(ESP8266_LED, OUTPUT);

#ifdef SERIAL_DEBUG
  /* Initialize serial output for debug */
  Serial.setDebugOutput(true);
  Serial.begin(9600, SERIAL_8N1);
  Serial.println();
#endif

  /*  Connect to local WiFi access point */
  WiFi.mode(WIFI_STA);
  WiFi.begin("YourApName", "yourWifiPassword");

#ifdef SERIAL_DEBUG
  Serial.print("Connecting");
#endif
  while (WiFi.status() != WL_CONNECTED)
  {
    delay(500);
#ifdef SERIAL_DEBUG
    Serial.print(".");
#endif
  }
#ifdef SERIAL_DEBUG
  /* When WiFi connection is complete, debug log connection info */
  Serial.println();
  Serial.print("Connected, IP address: ");
  Serial.println(WiFi.localIP());
#endif
}

void loop()
{
}
Running this code with serial debug enabled and the Arduino debug console open, you should see something like this:
Connecting......
Connected, IP address: 192.168.1.169
Adding WiFiClientSecure for TLS Transport Security
Next, we’ll create a WiFiClientSecure obejct to let us make TLS-encrypted connections. We’ll also include our base64-encoded PEM format CA cert and MQTT broker cert’s SHA1 fingerprint for validation. Once again, this is contrived data and not my own, and it’s best not to publish yours anywhere publicly.
The CA cert can be defined as so, below the includes/defines:
...
/* Certificate Authority info */
/* CA Cert in PEM format */
const char caCert[] PROGMEM = R"EOF(
-----BEGIN CERTIFICATE-----
MIHcAgEBBEIATXmkkoaxsd7d6QvaLYOFBpVWIKkpZiIVifjWyEvG7KORzlGXuWzA
67CkiTbUMscnzM7kn/YrwmITRDaYQ2eF0jagBwYFK4EEACOhgYkDgYYABAFzgTPk
co/CM1hNYyRm8Tnlq0l+rnFSst74VHqoj2wD9XOz7W8iFX1C0J4KsQy2N6FAccym
72tTstwCruZmuc91mgC+RyRm9TxcwvztEOFDkWeKpVCrheILGH03zBqb93p9nTIa
bUMscnzM7kn/YrwmITRDaYQ2eF0jagBwYFK4EEACOhgYkDgYYABAFzgTPkco/CM1
Rm8Tnlq0l+rnFSst74VHqoj2wD9XOz7W8iFX1C0J4KsQy2N6FAccymFSst74VHqF
zBqb93p9nTIa72tTstwCruZmuc91mgC+RyRm9TxcwvztEOFDkWeKpVCrheILGH03
zM7kn/YrwmITRDaYQ2eF0jag67CkiTbUMscnBwYFK4EEACOhgYkDgYYABAFzgTPk
qoj2wD9XOzco/CM1hNYJ4KsQy2N6FAccymyRm8Tnlq0l+7W8iFX1C0rnFSst74VH
rheILGH03zBqb93p9nTIa72tTc91mgC+RyRm9TxcwvztEOFDkWeKpVCstwCruZmu
qoj2wD9XOzco/CM1hGbPfS2UEKITVxTth9OZ+4rplg==
-----END CERTIFICATE-----
)EOF";
...
We also include a byte array to match against the MQTT broker cert SHA1 fingerprint we extracted earlier, and some globals needed by the WiFiClientSecure class to establish secure connections using the supplied CA cert and MQTT broker cert fingerprint:
...
/* MQTT broker cert SHA1 fingerprint, used to validate connection to right server */
const uint8_t mqttCertFingerprint[] = {0xFF,0x69,0xBB,0xAD,0xF0,0xDE,0x5F,0x89,0x23,0xF6,0x96,0xC1,0x03,0x04,0x23,0xB4,0xD3,0xD5,0x53,0x94};

/* Other globals */
X509List caCertX509(caCert);        /* X.509 parsed CA Cert */
WiFiClientSecure espClient;         /* Secure client connection class, as opposed to WiFiClient */
...
We can use a simple function to test if our TLS connections are being established correctly:
...
#ifdef TLS_DEBUG
/* verifytls()
 *  Test WiFiClientSecure connection using supplied cert and fingerprint
 */
bool verifytls() {
  bool success = false;

#ifdef SERIAL_DEBUG
  Serial.print("Verifying TLS connection to ");
  Serial.println("192.168.1.128");
#endif

  success = espClient.connect("192.168.1.128", 12345);

#ifdef SERIAL_DEBUG
  if (success) {
    Serial.println("Connection complete, valid cert, valid fingerprint.");
  }
  else {
    Serial.println("Connection failed!");
  }
#endif

  return (success);
}
#endif
...
Next, we can add some code to our setup() function after establishing a WiFi connection. Especially important here is including the line espClient.allowSelfSignedCerts(). Without it, the WifiClientSecure library will repeatedly fail to connect without much useful error output. After enabling debugging and scanning the Arduino ESP8266 Wifi library, I found that in addtion to a valid CA cert being loaded, at least one of the following must be enabled to make a successful TLS connection with self-signed certs:
allowSelfSignedCerts()setFingerprint(...)setInsecure()
Any of these three functions being called before establishing the session will allow self-signed cert connections. I chose to use the first two, which adds some redundant security checks (both cert and fingerprint must check out). I did not use setInsecure, because it will bypass both CA cert validation, and does not require a fingerprint check either, so you have no idea what you’re connecting to if someone changed the device at the other end of your connection without your knowledge.
The lines to add to setup() are:
...
  /* Configure secure client connection */
  espClient.setTrustAnchors(&caCertX509);         /* Load CA cert into trust store */
  espClient.allowSelfSignedCerts();               /* Enable self-signed cert support */
  espClient.setFingerprint(mqttCertFingerprint);  /* Load SHA1 mqtt cert fingerprint for connection validation */

  /* Optionally do none of the above and allow insecure connections.
   * This will accept any certificates from the server, without validation and is not recommended.
   */
  //espClient.setInsecure();

#ifdef TLS_DEBUG
  /* Call verifytls to verify connection can be done securely and validated - this is optional but was useful during debug */
  verifytls();
#endif
...
Recompile and reload your device, and if all goes well the Serial debug should look something like:
Connecting......
Connected, IP address: 192.168.1.169
Verifying TLS connection to 192.168.1.128
Connection complete, valid cert, valid fingerprint.
We’re now ready to add in MQTT support!
Adding Arduino Client for MQTT Support
We will use the Arduino Client for MQTT to enable connection from our ESP8266 to the MQTT broker using our now-secure TLS connection. First, add the library to our header section, and relevant global variables:
...
#include <PubSubClient.h>
...
PubSubClient mqttClient(espClient); /* MQTT Client connection */
String clientId = "ESP8266Client-"; /* MQTT client ID (will add random hex suffix during setup) */
...
The clientId can be whatever you want, but should be unique for each device. The prefix we use here will be concatenated with a random hex ascii string later to ensure uniqueness in our LAN. The actual MQTT connection will be made by the reconnect function, which will be called whenever that connection has not been established or drops, and will automatically subscribe to the some/topic/cmd topic to listen for incoming commands:
...
void reconnect() {
  /* Loop until we're reconnected */
  while (!mqttClient.connected()) {
#ifdef SERIAL_DEBUG
    Serial.print("Attempting MQTT broker connection...");
#endif
    /* Attempt to connect */
    if (mqttClient.connect(clientId.c_str())) {
#ifdef SERIAL_DEBUG
      Serial.println("connected");
#endif
      /* Once connected, resubscribe */
      mqttClient.subscribe("home/recroom/tv/powerstrip/cmd");
    }
    else {
#ifdef SERIAL_DEBUG
      Serial.print("Failed, rc=");
      Serial.print(mqttClient.state());
      Serial.println(". Trying again in 5 seconds...");
#endif
      /* Wait 5 seconds between retries */
      delay(5000);
    }
  }
}
...
In our setup() function, we must add the following, making sure to put it at the end after WiFi is established and the TLS check has been completed. Using the #defines, serial debug and TLS validation can be disabled later on when things are working:
...
  /* Configure MQTT Broker settings */
  mqttClient.setServer("192.168.1.128",12345);
  mqttClient.setCallback(subCallback);

  /* Add random hex client ID suffix once during each reboot */
  clientId += String(random(0xffff), HEX);
...
This code adds some random characters to our clientId each time we reboot the device. You can also provide unique IDs to each board using the MAC address or some other mechanism if you prefer. Also, notice the subCallback routine we pass in to the setCallback function. This is the function that will be called when our MQTT client receives a message to its subscribed topics. We’ll get to that in a moment.
In our loop() function, we’ll add the following code, which will try to establish an MQTT client connection whenever it’s not present, and will call the mqttClient.loop() function as well, which is required for proper functionality:
...
void loop()
{
  /* Main loop. Attempt to re-connect to MQTT broker if connection drops, and service the mqttClient task. */
  if(!mqttClient.connected()) {
    reconnect();
  }
  mqttClient.loop();
}
...
Finally, we can flesh out the subCallback function. In my case, I wanted to use JSON messages to my topics, rather than just plaintext, so I’ve included the Arduino JSON Library:
...
#include <ArduinoJson.h>
...
The subCallback function then is written as so. Note the static int pinStatus which will maintain the staus of our control pin between calls. Note also, that we are expecting JSON and then parsing the JSON via some if/else checks to determine the course of action:
...
void subCallback(char *topic, byte *payload, unsigned int length)
{
  static int pinStatus = LOW;
  DynamicJsonDocument doc(256);
  deserializeJson(doc, (char*)payload);
  JsonObject root = doc.as<JsonObject>();

#ifdef SERIAL_DEBUG
  serializeJson(root, Serial);
  Serial.println();
#endif

  if(!root["set"].isNull()) {
    if(root["set"] == "toggle") {
      pinStatus = !pinStatus;
    } else if (root["set"] == "on") {
      pinStatus = HIGH;
    } else if (root["set"] == "off") {
      pinStatus = LOW;
    } else {
      return;
    }
    digitalWrite(RELAY_SIGNAL_PIN, pinStatus);
    mqttClient.publish("home/recroom/tv/powerstrip/status", pinStatus == LOW ? "off" : "on");
  } else if(!root["get"].isNull()) {
    if(root["get"] == "status") {
      mqttClient.publish("home/recroom/tv/powerstrip/status", pinStatus == LOW ? "off" : "on");
    }
  }
}
...
The expected behavior here is that someone can publish to the home/recroom/tv/powerstrip/cmd topic with JSON messages in the form of either:
{"set" : "toggle"},{"set" : "on"},{"set" : "off"}- These will toggle, explcitly turn on, or explicitly turn off the control pin, respectively
- These will also return the current pin status at the topic path
home/recroom/tv/powerstrip/statusas “on” or “off” after the pin status has been modifed according to the incoming command
{"get" : "status"}- This will return the current pin status at the topic path
home/recroom/tv/powerstrip/statusas “on” or “off”
- This will return the current pin status at the topic path
When doing so, the ESP8266 will toggle the RELAY_SIGNAL_PIN, and you should see the relay board open and close the internal switch accordingly. You can replace all references to RELAY_SIGNAL_PIN with ESP8266_LED instead to toggle the LED for your own testing purposes.
To test that our messages are getting through to the broker and out to subscribers, we can run some commands from the terminal again while the ESP8266 is running.
First we subscribe to the home/recroom/tv/powerstrip/status, which is where the ESP8266 will send its status messages:
[albeec13@arch ~]$ mosquitto_sub -h 192.168.1.128 -p 12345 --cafile /path/to/ca.crt -t home/recroom/tv/powerstrip/status -v &
[1] 14154
Next, we can publish a command to the ESP8266’s topic of interest to make it toggle the LED or relay signal like so, and see right away if the device is responding with status messages:
[albeec13@arch ~]$ mosquitto_pub -h 192.168.1.128 -p 12345 --cafile /path/to/ca.crt -t home/recroom/tv/powerstrip/cmd -m {\"set\":\"toggle\"}
home/recroom/tv/powerstrip/status on
Looks good from that end. Now let’s check the ESP8266 debug side. When running the code with TLS and Serial debug enabled, you should see output to the serial console similar to the following as you send test commands to the MQTT broker:
Connecting......
Connected, IP address: 192.168.1.169
Verifying TLS connection to 192.168.1.128
Connection complete, valid cert, valid fingerprint.
Attempting MQTT broker connection...connected
{"get":"status"}
{"get":"status"}
{"set":"off"}
{"set":"on"}
Conclusion
And that’s a wrap! We’ve now gone through all the steps to:
- Create a self-signed certificate authority (CA) cert
- Use our CA to sign a MQTT broker cert
- Use our MQTT broker cert and CA cert to configure Mosquitto to run with TLS transport encryption
- Write Arduino code for an ESP8266 board to:
- Connect to our WiFi network
- Establish TLS connections using our CA cert and MQTT broker cert fingerprint
- Connect to our MQTT broker as a client
- Publish and subscribe to channels and operate a relay or LED based on JSON commands via the MQTT broker
With this as a basis, you can also do things like create your own channels and command structure, with or without JSON, and proceed with enabling MQTT client authentication using either passwords (since they will no longer be in the clear with TLS enabled) or client certs (which you can create/sign with your CA cert).
Full Arduino Source Code
Below, you can find the entirety of the source code I described above:
#include <ESP8266WiFi.h>
#include <PubSubClient.h>
#include <ArduinoJson.h>

#define ESP8266_LED (5)
#define RELAY_SIGNAL_PIN (4)
//#define SERIAL_DEBUG
//#define TLS_DEBUG

/* Certificate Authority info */
/* CA Cert in PEM format */
const char caCert[] PROGMEM = R"EOF(
-----BEGIN CERTIFICATE-----
MIHcAgEBBEIATXmkkoaxsd7d6QvaLYOFBpVWIKkpZiIVifjWyEvG7KORzlGXuWzA
67CkiTbUMscnzM7kn/YrwmITRDaYQ2eF0jagBwYFK4EEACOhgYkDgYYABAFzgTPk
co/CM1hNYyRm8Tnlq0l+rnFSst74VHqoj2wD9XOz7W8iFX1C0J4KsQy2N6FAccym
72tTstwCruZmuc91mgC+RyRm9TxcwvztEOFDkWeKpVCrheILGH03zBqb93p9nTIa
bUMscnzM7kn/YrwmITRDaYQ2eF0jagBwYFK4EEACOhgYkDgYYABAFzgTPkco/CM1
Rm8Tnlq0l+rnFSst74VHqoj2wD9XOz7W8iFX1C0J4KsQy2N6FAccymFSst74VHqF
zBqb93p9nTIa72tTstwCruZmuc91mgC+RyRm9TxcwvztEOFDkWeKpVCrheILGH03
zM7kn/YrwmITRDaYQ2eF0jag67CkiTbUMscnBwYFK4EEACOhgYkDgYYABAFzgTPk
qoj2wD9XOzco/CM1hNYJ4KsQy2N6FAccymyRm8Tnlq0l+7W8iFX1C0rnFSst74VH
rheILGH03zBqb93p9nTIa72tTc91mgC+RyRm9TxcwvztEOFDkWeKpVCstwCruZmu
qoj2wD9XOzco/CM1hGbPfS2UEKITVxTth9OZ+4rplg==
-----END CERTIFICATE-----
)EOF";

/* MQTT broker cert SHA1 fingerprint, used to validate connection to right server */
const uint8_t mqttCertFingerprint[] = {0xFF,0x69,0xBB,0xAD,0xF0,0xDE,0x5F,0x89,0x23,0xF6,0x96,0xC1,0x03,0x04,0x23,0xB4,0xD3,0xD5,0x53,0x94};

/* Other globals */
X509List caCertX509(caCert);        /* X.509 parsed CA Cert */
WiFiClientSecure espClient;         /* Secure client connection class, as opposed to WiFiClient */
PubSubClient mqttClient(espClient); /* MQTT Client connection */
String clientId = "ESP8266Client-"; /* MQTT client ID (will add random hex suffix during setup) */

#ifdef TLS_DEBUG
/* verifytls()
 *  Test WiFiClientSecure connection using supplied cert and fingerprint
 */
bool verifytls() {
  bool success = false;

#ifdef SERIAL_DEBUG
  Serial.print("Verifying TLS connection to ");
  Serial.println("192.168.1.128");
#endif

  success = espClient.connect("192.168.1.128", 12345);

#ifdef SERIAL_DEBUG
  if (success) {
    Serial.println("Connection complete, valid cert, valid fingerprint.");
  }
  else {
    Serial.println("Connection failed!");
  }
#endif

  return (success);
}
#endif

void reconnect() {
  /* Loop until we're reconnected */
  while (!mqttClient.connected()) {
#ifdef SERIAL_DEBUG
    Serial.print("Attempting MQTT broker connection...");
#endif
    /* Attempt to connect */
    if (mqttClient.connect(clientId.c_str())) {
#ifdef SERIAL_DEBUG
      Serial.println("connected");
#endif
      /* Once connected, resubscribe */
      mqttClient.subscribe("home/recroom/tv/powerstrip/cmd");
    }
    else {
#ifdef SERIAL_DEBUG
      Serial.print("Failed, rc=");
      Serial.print(mqttClient.state());
      Serial.println(". Trying again in 5 seconds...");
#endif
      /* Wait 5 seconds between retries */
      delay(5000);
    }
  }
}

void setup()
{
  /* Set board's GPIO pins as outputs */
  pinMode(RELAY_SIGNAL_PIN, OUTPUT);
  pinMode(ESP8266_LED, OUTPUT);

#ifdef SERIAL_DEBUG
  /* Initialize serial output for debug */
  Serial.setDebugOutput(true);
  Serial.begin(9600, SERIAL_8N1);
  Serial.println();
#endif

  /*  Connect to local WiFi access point */
  WiFi.mode(WIFI_STA);
  WiFi.begin("YourApName", "yourWifiPassword");

#ifdef SERIAL_DEBUG
  Serial.print("Connecting");
#endif
  while (WiFi.status() != WL_CONNECTED)
  {
    delay(500);
#ifdef SERIAL_DEBUG
    Serial.print(".");
#endif
  }
#ifdef SERIAL_DEBUG
  /* When WiFi connection is complete, debug log connection info */
  Serial.println();
  Serial.print("Connected, IP address: ");
  Serial.println(WiFi.localIP());
#endif

  /* Configure secure client connection */
  espClient.setTrustAnchors(&caCertX509);         /* Load CA cert into trust store */
  espClient.allowSelfSignedCerts();               /* Enable self-signed cert support */
  espClient.setFingerprint(mqttCertFingerprint);  /* Load SHA1 mqtt cert fingerprint for connection validation */

  /* Optionally do none of the above and allow insecure connections.
   * This will accept any certificates from the server, without validation and is not recommended.
   */
  //espClient.setInsecure();

#ifdef TLS_DEBUG
  /* Call verifytls to verify connection can be done securely and validated - this is optional but was useful during debug */
  verifytls();
#endif

  /* Configure MQTT Broker settings */
  mqttClient.setServer("192.168.1.128",12345);
  mqttClient.setCallback(subCallback);

  /* Add random hex client ID suffix once during each reboot */
  clientId += String(random(0xffff), HEX);
}

void loop()
{
  /* Main loop. Attempt to re-connect to MQTT broker if connection drops, and service the mqttClient task. */
  if(!mqttClient.connected()) {
    reconnect();
  }
  mqttClient.loop();
}

void subCallback(char *topic, byte *payload, unsigned int length)
{
  static int pinStatus = LOW;
  DynamicJsonDocument doc(256);
  deserializeJson(doc, (char*)payload);
  JsonObject root = doc.as<JsonObject>();

#ifdef SERIAL_DEBUG
  serializeJson(root, Serial);
  Serial.println();
#endif

  if(!root["set"].isNull()) {
    if(root["set"] == "toggle") {
      pinStatus = !pinStatus;
    } else if (root["set"] == "on") {
      pinStatus = HIGH;
    } else if (root["set"] == "off") {
      pinStatus = LOW;
    } else {
      return;
    }
    digitalWrite(RELAY_SIGNAL_PIN, pinStatus);
    mqttClient.publish("home/recroom/tv/powerstrip/status", pinStatus == LOW ? "off" : "on");
  } else if(!root["get"].isNull()) {
    if(root["get"] == "status") {
      mqttClient.publish("home/recroom/tv/powerstrip/status", pinStatus == LOW ? "off" : "on");
    }
  }
}
Special Thanks
In addition to all the great tools and libraries mentioned in the prerequisites, the following links were helpful to me during my research:
- Command Line Elliptic Curve Operations
- Configuring ssl requests with SubjectAltName with openssl
- Arduino ESP8266 Documentation
- Creating Your Own SSL Certificate Authority (and Dumping Self Signed Certs)
- Arduino JSON Reference
Please comment below if this helped you, or if you have any suggestions for improvements!